Getting Started
This tutorial provides an overview on how to use the CALIPSO Visualization Tool program.
Interface Layout
Upon first starting VOCAL, you’ll be greeted with the initial view of the application. The large center most window is the main screen for displaying data from .HDF files, this will be where you see the data.
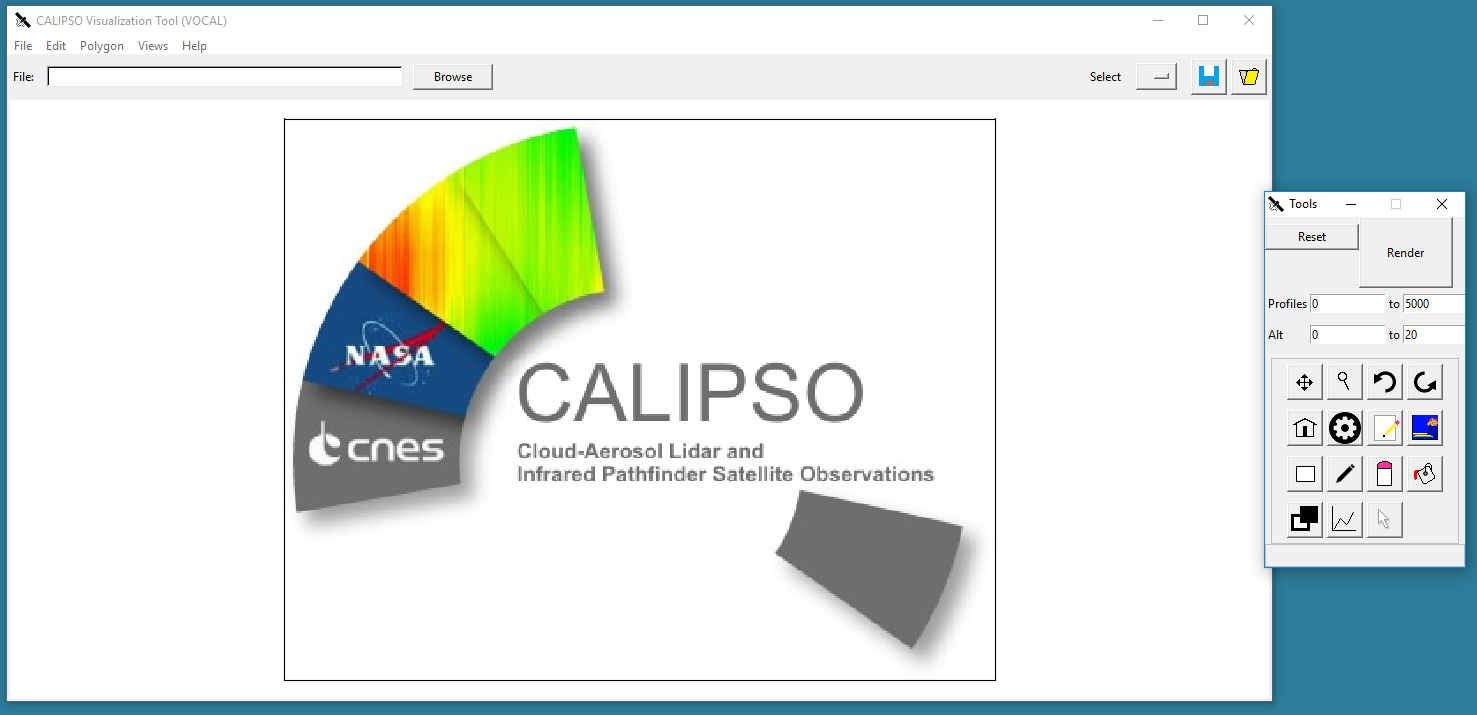
The top most menu bar contains four directories: file , edit, polygon, views, and help.
- file allows a user to import an HDF (same as
 ), save all objects from all plots to a JSON file,
 - change configuration settings, or exit the application.
- file allows a user to import an HDF (same as
- edit offers tools for shape or plot manipulation
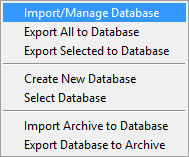
- polygon relates to the database use, see Using the Database for more information.
- views allows a user to select the data product to be rendered
- help shows information on the project, and links to this website
Located near the menu and off to the top right you’ll find three buttons.  will load a JSON file previously
created by the application, and draw it to the plot.
will load a JSON file previously
created by the application, and draw it to the plot.
Note
It is recommended that you use the tools provided in the polygon folder and the database for saving drawn shapes. Using JSON files can get messy and may not work properly.
When loading JSON objects using this feature: the file the shape was created in must match the file you currently have loaded, otherwise you’ll get an error! We do not allow users to load shapes from JSON files which are from other files than what the user is currently on.
 will prompt you for a filename and then save all selected objects to that file. There are a number of
ways to select objects, via the edit menu, using
will prompt you for a filename and then save all selected objects to that file. There are a number of
ways to select objects, via the edit menu, using 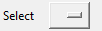 for single objects, or manually selecting objects
using
for single objects, or manually selecting objects
using  .
.
is a drop down menu feature for single shape selection. The list is populated with all shapes
currently drawn to the plot and selecting one from the menu will highlight that single shape. To unselect any
shapes, you can either select the blank field in the drop down list or use the deselect all option in the
edit menu.
Off to the right is the tools window, this window is dedicated to the manipulation of the data displayed to the plot.
 destroy all shapes existing in the plot and reset the view back to the original view of the initial
render
destroy all shapes existing in the plot and reset the view back to the original view of the initial
render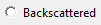 Selection option used when visualizing, having this option checked will display the data
as backscattered
Selection option used when visualizing, having this option checked will display the data
as backscattered Selection option used when visualizing, having this option checked will display the data as
depolarized.
Selection option used when visualizing, having this option checked will display the data as
depolarized. Specify the range of profiles (vertical columns of data) to plot to, from x to y.
- Default is 0 to 5000.
 Specify the range of altitude to plot to, from x to y. Default is 0 to 20
 Visualize the data given the conditions entered into step and Views tab
Starting Up
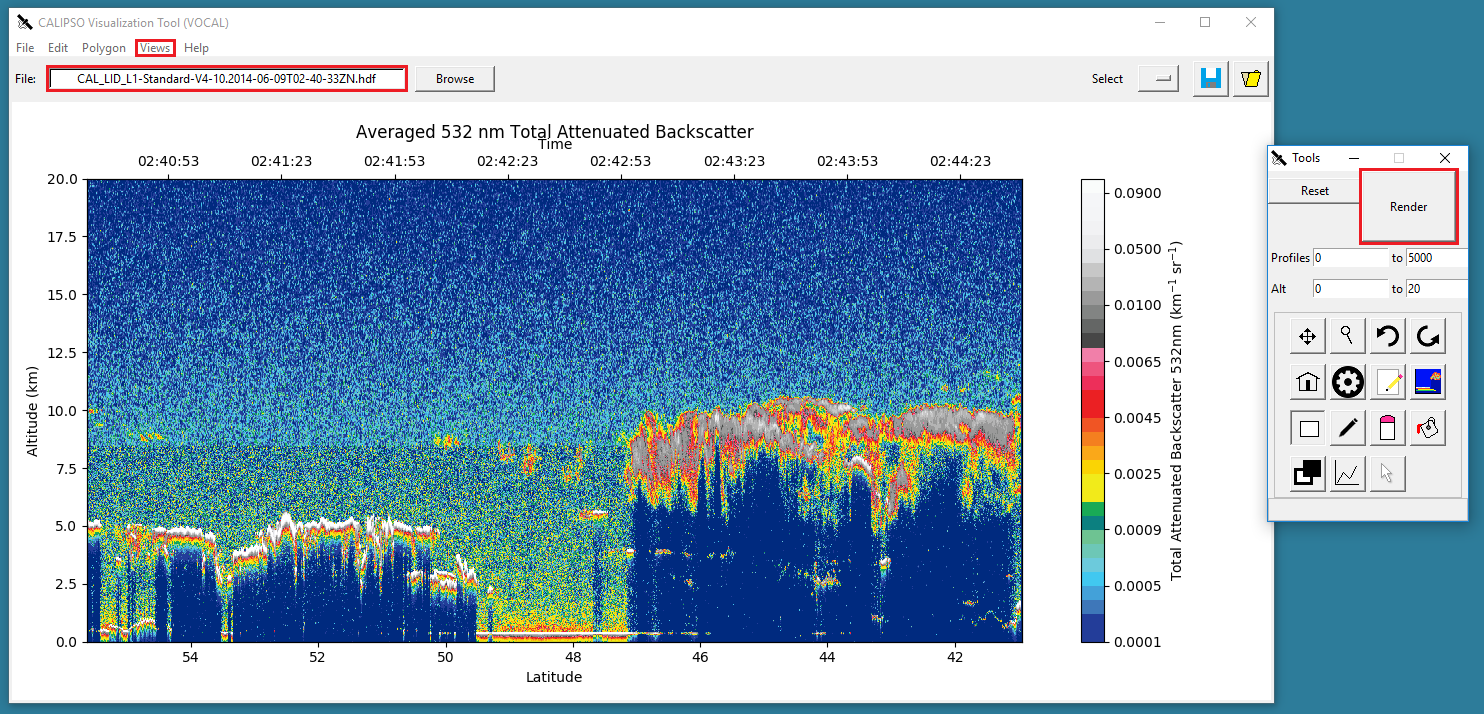
To load a CALIPSO hdf file from the local file directory, click the button at the
top of the screen. Navigate to the .HDF file of your choice and select open The file text box will now update and
display the name of the imported hdf file. The main screen will appear blank at first. To display a plot,
Select the type of plot you would like from the views menu to render and an optional step
(the default is from 0 to 5000).
Hit to visualize the data to the screen.
Navigating the Plot
The first row of toolbar buttons allows you to manipulate the plot for the purpose of drawing.
 Pan: Clicking and dragging will allow you to move the plot across
the screen by the amount of drag used, either left or right.
Pan: Clicking and dragging will allow you to move the plot across
the screen by the amount of drag used, either left or right. Magnify: Selecting this
button will allow you to zoom in and out of the plot. To zoom in, click and
drag with the left mouse button the area on the plot you wish to zoom in. To
zoom out, click and drag with the right mouse button and the plot will zoom
out based upon the scale difference of the area you highlighted.
Magnify: Selecting this
button will allow you to zoom in and out of the plot. To zoom in, click and
drag with the left mouse button the area on the plot you wish to zoom in. To
zoom out, click and drag with the right mouse button and the plot will zoom
out based upon the scale difference of the area you highlighted. Undo: jump to the previous magnification zoom frame
 Redo: jump forward to the next magnification zoom frame
 Home: reset the view to the original render
Note
Magnification currently does not work
Viewing Properties of Shapes
The second row of buttons (minus the home button) is dedicated to the viewing, assigning, and extraction of data from shapes
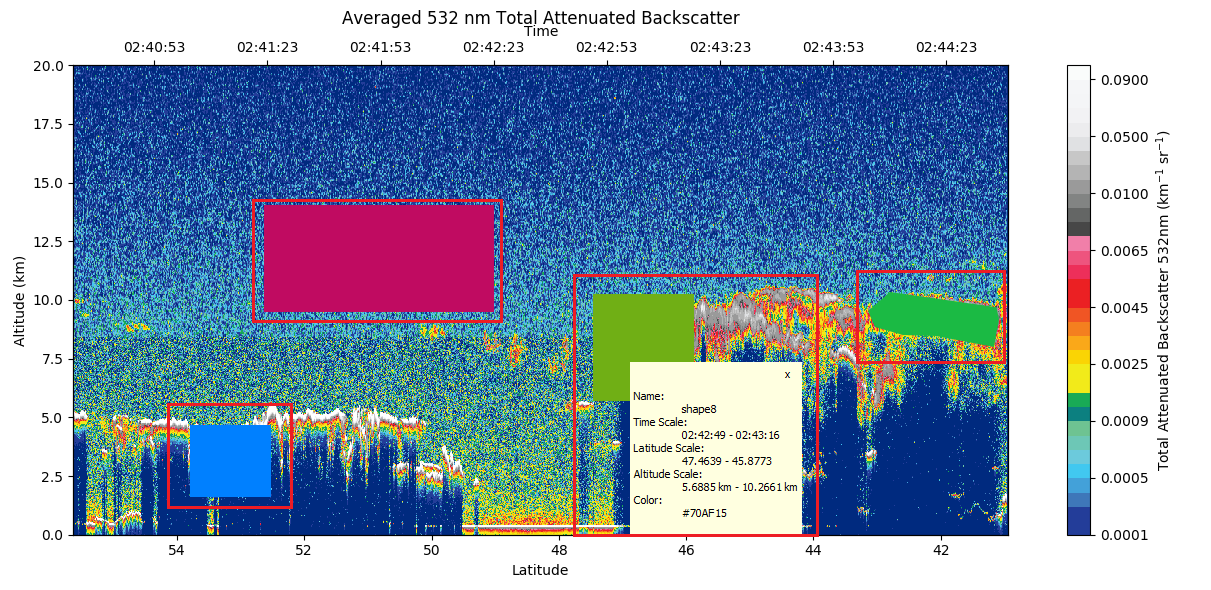
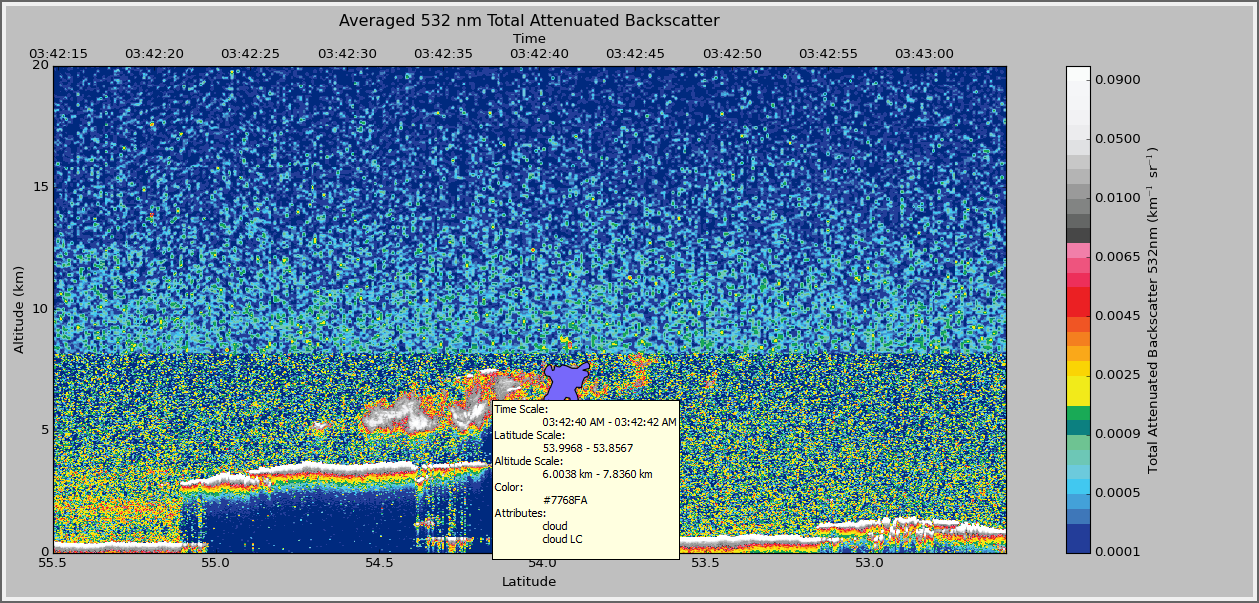
 Properties: Clicking on a shape while the properties button is active will open a small
window detailing the range of time and altitude covered by the shape, attributes, and notes.
click once more to hide the properties window
Properties: Clicking on a shape while the properties button is active will open a small
window detailing the range of time and altitude covered by the shape, attributes, and notes.
click once more to hide the properties window Attributes: Clicking on a shape while the attributes button is active will open a
dialog window for assigning attributes to shapes. Attributes on the left are the available
attributes, the right side is the selected attributes. Add any notes you wish and click
save to save the notes and attributes. These can be viewed with
Attributes: Clicking on a shape while the attributes button is active will open a
dialog window for assigning attributes to shapes. Attributes on the left are the available
attributes, the right side is the selected attributes. Add any notes you wish and click
save to save the notes and attributes. These can be viewed with  Extract: Clicking on a shape while the extract button is active will create a subplot
containing only the data enclosed in the shape. Future features are to come but for now a
subplot and histogram are generated for the shape.
Extract: Clicking on a shape while the extract button is active will create a subplot
containing only the data enclosed in the shape. Future features are to come but for now a
subplot and histogram are generated for the shape.
Drawing Shapes
The third row of buttons is for creating and manipulating the physical properties of shapes drawn to the plot.
 Rectangle: Dragging the cursor in the plot will create an outline of a rectangle,
upon release of the cursor the shape will be created in place of the outline.
Rectangle: Dragging the cursor in the plot will create an outline of a rectangle,
upon release of the cursor the shape will be created in place of the outline. Free Draw: Clicking on the plot will create a vertex, multiple clicks will
bind vertices together and create lines. If a new line intersects an
existing line a shape will be formed at the intersection being the enclosing vertex.
Free Draw: Clicking on the plot will create a vertex, multiple clicks will
bind vertices together and create lines. If a new line intersects an
existing line a shape will be formed at the intersection being the enclosing vertex. Erase: Selecting this button and clicking a shape will remove it from the plot. note: *
this will **not* delete the object in a database or JSON file if it is loaded, that is a
separate deletion itself
Erase: Selecting this button and clicking a shape will remove it from the plot. note: *
this will **not* delete the object in a database or JSON file if it is loaded, that is a
separate deletion itself Paint: Give a shape a new color value by selecting either a predefined color or
some custom value on the color wheel. Changing the color of a shape will not create
a new shape, simply update the color value of existing shapes you’ve loaded.
Paint: Give a shape a new color value by selecting either a predefined color or
some custom value on the color wheel. Changing the color of a shape will not create
a new shape, simply update the color value of existing shapes you’ve loaded.
Hiding and Sharing Specific Shapes
The last row of buttons deals with global state of shape viewing as well as the exporting of shapes to a JSON file.
 Focus: Press this button to display all shapes and future shapes as unfilled.
Only the outline of the shapes will be drawn, pressing this one more reverts the change
Focus: Press this button to display all shapes and future shapes as unfilled.
Only the outline of the shapes will be drawn, pressing this one more reverts the change Hide: Similar to Focus, but pressing this button will completely hide all shapes,
they still exist; however they simply won’t be drawn to the screen.
Hide: Similar to Focus, but pressing this button will completely hide all shapes,
they still exist; however they simply won’t be drawn to the screen.- Select: Use the cursor to select shapes
Using the Database
One of the defining features of VOCAL is the ability to import and export shapes to a database, this can help researchers share information about aerosols and their trajectory. The database can be accessed under the polygon menu, offering to either import from database, export to database, create database and select database. Let’s start with creating and selecting a database.
Creating a Database
By default, VOCAL uses the database file CALIPSOdb.db located in the VOCAL/db folder. However, you are free to create your own database elsewhere. Simply go to the polygon menu and select create database. You may name it whatever you like, and VOCAL will create it. When you create a new database, VOCAL will automatically switch to it. However, if you already have a CALIPSO database you would like to use, then you can simply select it.
Selecting a Database
To select a database created by VOCAL, simply go to the polygon menu and select select database. The tool will then prompt you to select your desired CALIPSO database. Once selected, all operations in the polygon menu will utilize this database. This can be useful if you would like to use a database on a shared folder.
Note
If you would like to work out of the non-default database, you must select it every time you open VOCAL, or you may change the default database in the settings dialog. If you do not select your new database every time or switch the default, VOCAL will save your polygons to the internal database.
Exporting Shapes
Say you have a number of shapes you’ve labeled with attributes and want to share with other researchers
Exporting these shapes is as easy as going to the polygon menu and hitting export to database

All objects have now been exported to the database! All done!
Importing Shapes
Now lets import some shapes, consider down the road your database now has a number of different objects from different files; your coworker tells you “Hey, check out shape 31 by John and it’s properties”. There are a couple ways to go about this, first head over to the import from database window.
This will open the import dialog
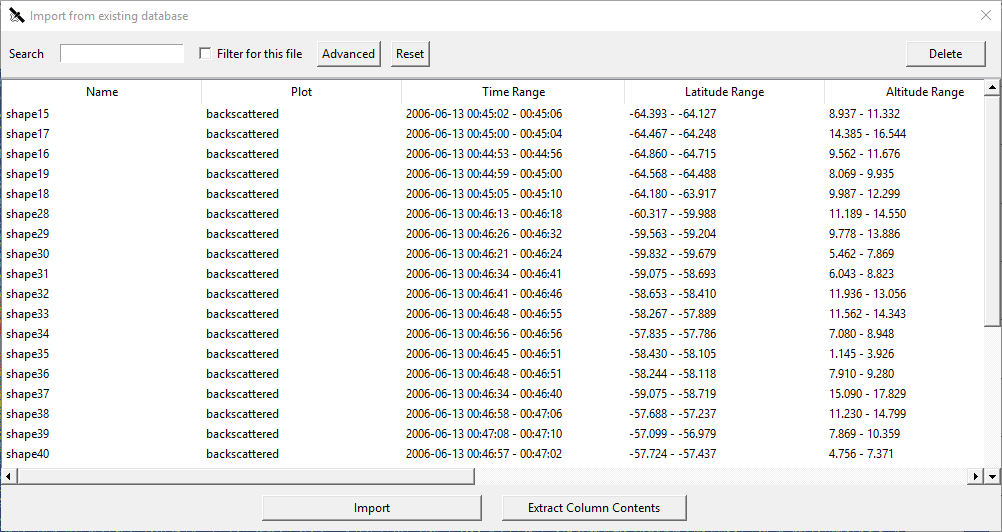
 allows the user to dynamically query the database for keys entered into the search bar. It will currently
search the Name, Attributes, and Notes notes categories for the string entered.
allows the user to dynamically query the database for keys entered into the search bar. It will currently
search the Name, Attributes, and Notes notes categories for the string entered.  will filter
all entries based on whether the filename matches the current filename loaded, note: this will not work
if your HDF has been renamed in anyway from the standard CALIPSO naming conventions.
will filter
all entries based on whether the filename matches the current filename loaded, note: this will not work
if your HDF has been renamed in anyway from the standard CALIPSO naming conventions.  will delete any
selected entries from the database, and this is permanent, there’s no undo button here.
will delete any
selected entries from the database, and this is permanent, there’s no undo button here.
So you can go ahead and search either the query John to get all notes that include the name john, or shape31 to get the specific shape. All names are unique, if at any time you see two shapes with the same tag this is a bug on our part please report that issue immediately to us for fixing. So searching for shape40 will leave you with
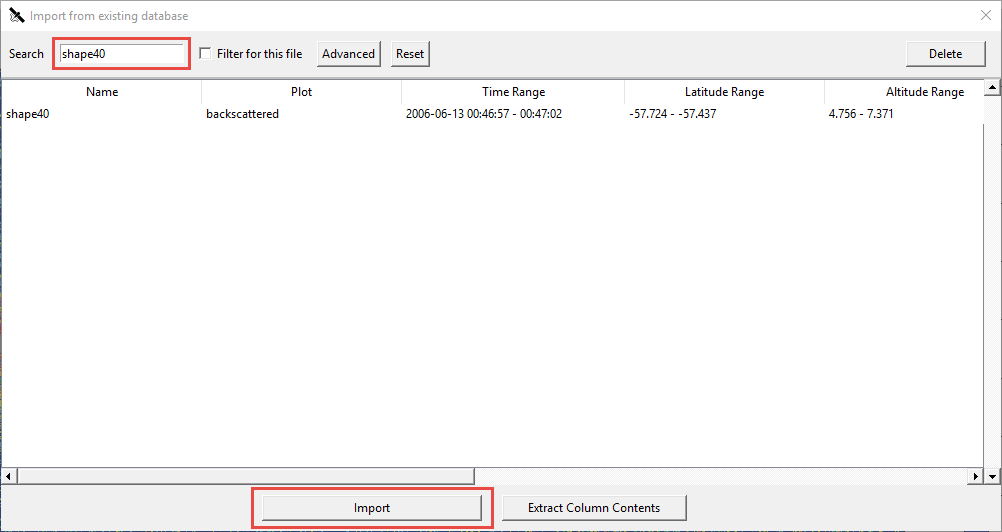
Clicking  will now import the selection to your internal shape manager. If you aren’t on the correct file the
shape was drawn one you won’t be able to see it, each file has a unique range of time thus on object can be loaded
onto multiple files. Scrolling right on the import window would have revealed the column File Name, which read
CAL_LID_L1-ValStage1-V3-01.2007-06-12T03-42-18ZN, so upon loading up that file walla! your object should appear.
will now import the selection to your internal shape manager. If you aren’t on the correct file the
shape was drawn one you won’t be able to see it, each file has a unique range of time thus on object can be loaded
onto multiple files. Scrolling right on the import window would have revealed the column File Name, which read
CAL_LID_L1-ValStage1-V3-01.2007-06-12T03-42-18ZN, so upon loading up that file walla! your object should appear.
you’re free to view properties of this shape, export it’s data to JSON or even modify the shape and re-export it back to the database.
Extracting Column Data from the Database
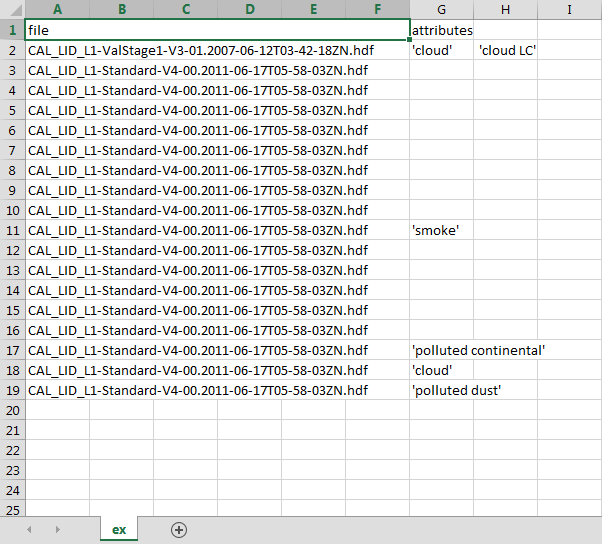
Another useful feature of the database is extracting column data in a specified file format. If say you’d like to
get a list of files that contain the ‘smoke’ attribute, you can do just that. You can open the column extraction tool
inside of the import database window by clicking  . This opens:

Once here, you can select any columns you’d like to export as well as the file format. The .csv format is RFC
4180 compliant and the text file is a simple whitespace and newline separated format. For example if one were to
select to export the columns  and
and  , in the format
  . You would see something like:
Sharing Your Database
Now say you get into contact with another researcher, one who’s been developing a database on tracking low hanging clouds in the atmosphere for example; you’ve been focusing on tracking other objects but would love to take a look at his shapes, well VOCAL has a feature for sharing entire databases with each other!
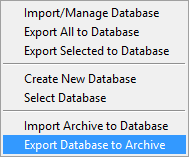
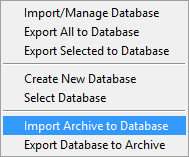
Exporting To an Archive
Let’s export a database first, you’ll find the database exportation feature in the Polygon menu option, pictured here:
Selecting this option will ask you if you wish to really export your database to an achive, and selecting yes will prompt you with a file dialog for choosing the name and location of the archive you’d like to create.
Note
Exporting your database is a copy operation, the contents of your database will remain the same and simply be copied to the archive, which can be loaded as shown below
Once exported you’ll have an archive of your specified name, something like my_shapes.zip. Feel free to take a peek inside the file, it’s simply a formatted zip containing your shapes exported in a JSON format. Now you can share this archive file to whoever you wish and easily share your entire database for other researchers!
Importing From an Archive
Now when you receive a database archive yourself, you’ll want to import that archive and start using the shapes right away; the command Import archive to database will do just that.
Upon clicking this menu option, a prompt will open asking you for a valid .zip file. Navigate to a zip file in the valid format that Export database to archive produced, and open that. VOCAL will then extract the data from that file and import all objects located in the archive.
Warning
Importing shapes from an archive will not preserve their tag, regardless of whether is already exists or not, imported shapes are treated as ‘new’ creations e.g. they will be assigned a unique tag based off of the current database tags.
Advanced Querying
VOCAL’s database comes with a robust querying ability, allowing you to search over a wide range of parameters. To open
the advanced search dialog, head over to the polygon -> Import from Database menu to open up the database window,
and then click on  . Once open you will see
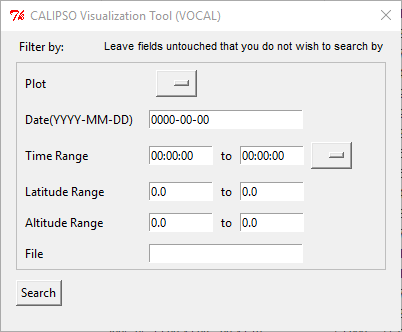
Any fields not entered or filled out will simply be ignored upon searching, so don’t worry about filling fields out with empty values.
Note
You must fill out the entries in the exact format as they appear in the dialog. Additionally, deleting a default value and leaving the entry empty will cause undefined behavior
So lets say you have a bunch of items in your database, but you only really want to see shapes from the file CAL_LID_L1-Standard-V4-00.2006-06-13T00-44-41ZD.hdf with a latitude of -60 to -50, and maybe you also don’t want anything higher than 13km. Here’s what it would look like within the advanced search dialog:
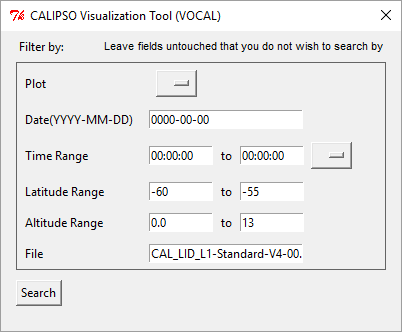
And here’s what we get!
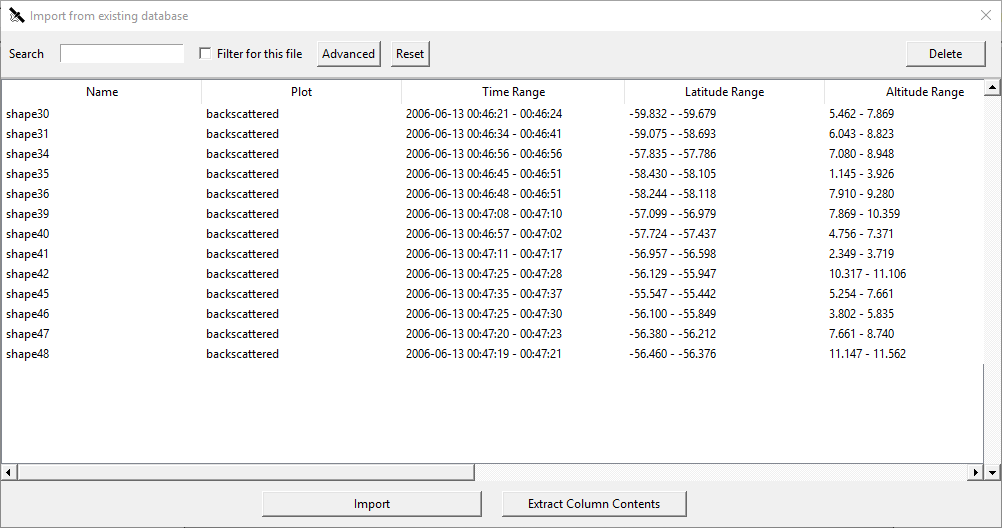
That’s all there is to it. Notice we left everything blank that we didn’t care about, if you don’t touch it that field won’t be checked!
Changing the Settings
Note
Be careful when changing the settings as they may have undesired affects. If at anytime they are causing you issues, simply delete config.json in the dat folder to return to defaults.
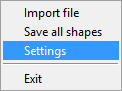
Finally, lets take a look at some of the options available to you to customize your VOCAL experience. In the file menu, you will find an option for settings. Selecting this will open up a new dialog listing all of the settings available for you to change.
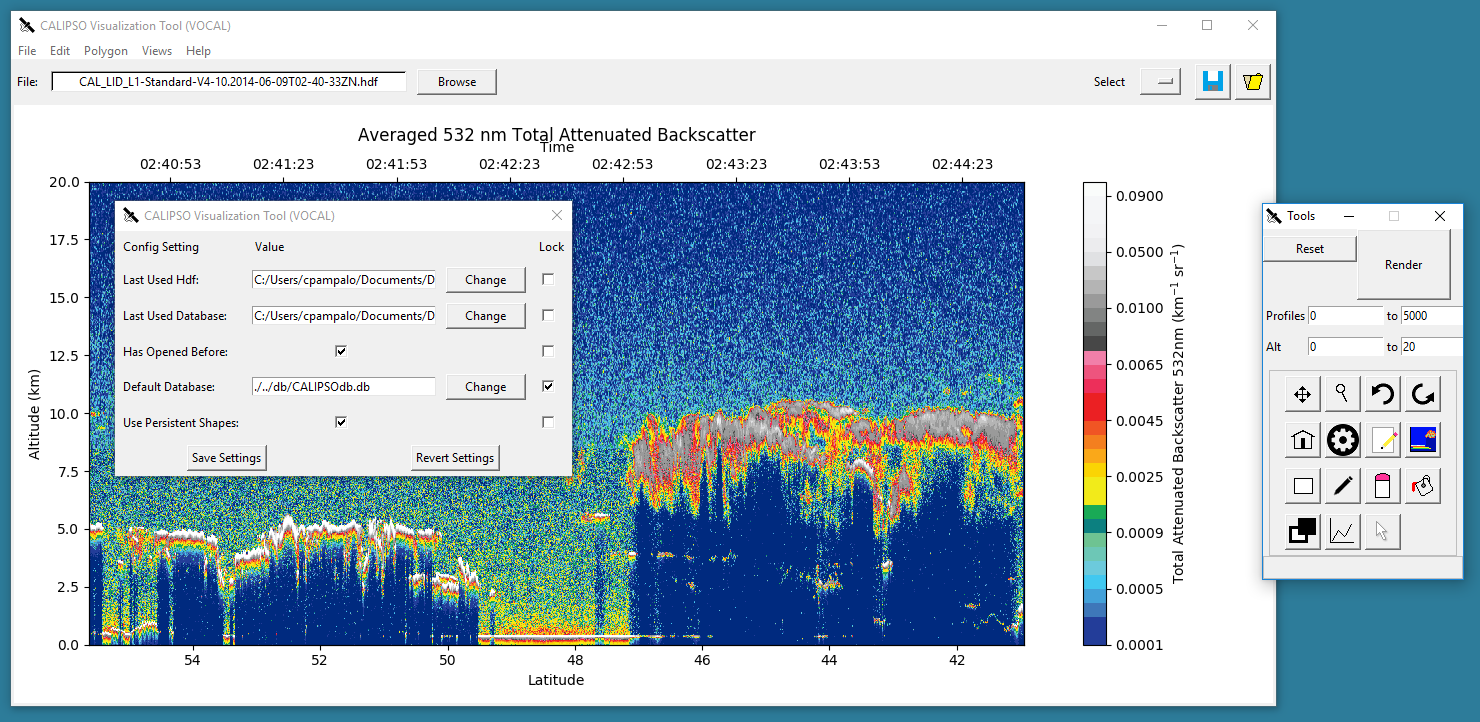
Each setting has its own row with a label for the setting, the current value of the setting, and a check box for locking the setting. For directory or file path setting, you will see a dialog box followed by a button allowing you to browse to a new file path or directory. For boolean settings (true or false) you will see a checkbox where checked represents true and unchecked represents false. Finally, the lock option ensures that the setting won’t change unless you change it in the dialog.
You should now be ready to use VOCAL!